
By making your own soap at home, not only can you customise the soap that you use every day, but you also reduce packaging waste and eliminate the use of parabens, surfactants and other undesirable chemicals.
My late friend Barb introduced me to soap making over eight years ago, and since then we have been making our own simple soap that is a pleasure to use. I thought to share this process as making soap is easy to learn and in these days of frequent hand-washing, it is handy to be able to make a mild and cost-effective soap.
When I first started this blog my intention was not only to celebrate nature in suburban spaces, but also to include practical activities that let nature into our suburbs, gardens and households. Many such practical activities connect us to the practices of previous more self-sufficient generations and remind us of useful household skills that ordinary people are losing or have lost. Such practical activities can have the virtues of frugality – by reducing what we use at a lower cost using less harmful ingredients and producing less packaging waste – all attributes that contribute to reducing our impacts on our natural environment.
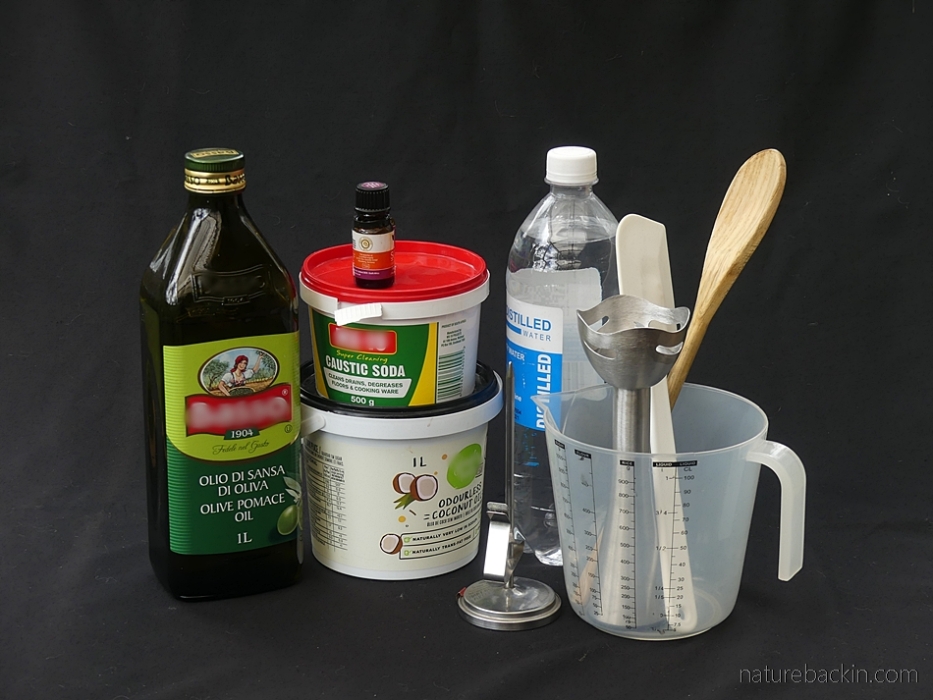
Only a few ingredients and basic equipment are required for making cold process soap at home
The soap making recipe that Barb shared with me back in 2012 is modest in that it uses only a few easily obtained ingredients and as it is a cold process soap, it only requires enough heat to melt the coconut oil. Further, no specialised equipment is needed. Apart from containers, a spoon and an optional spatula, more expensive items such as a candy thermometer, a kitchen scale and a stick blender may well be kitchen equipment that you already own. Also a mould will be needed, but more on that later.
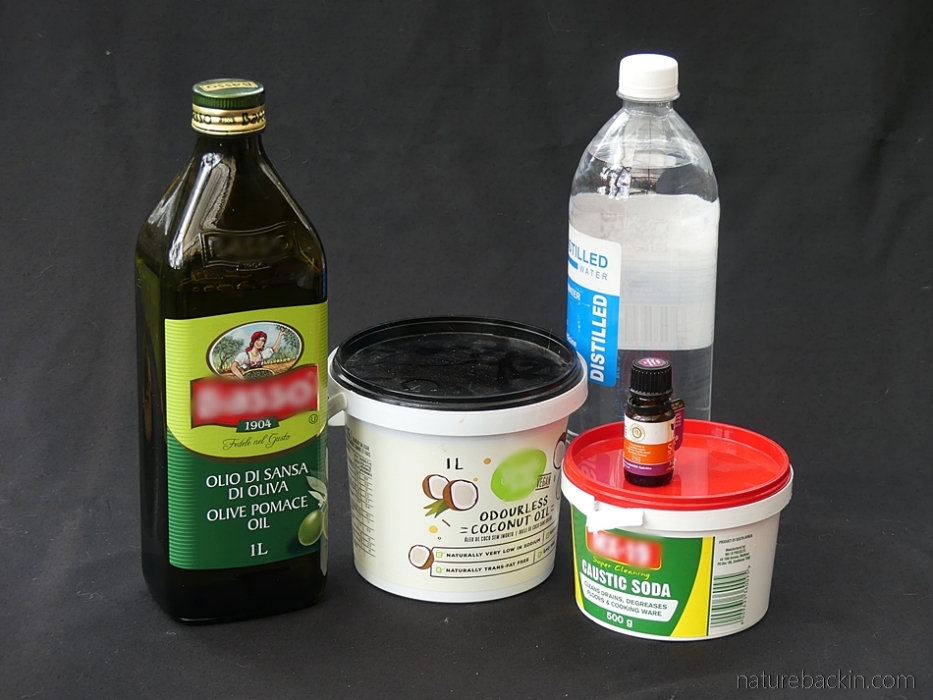
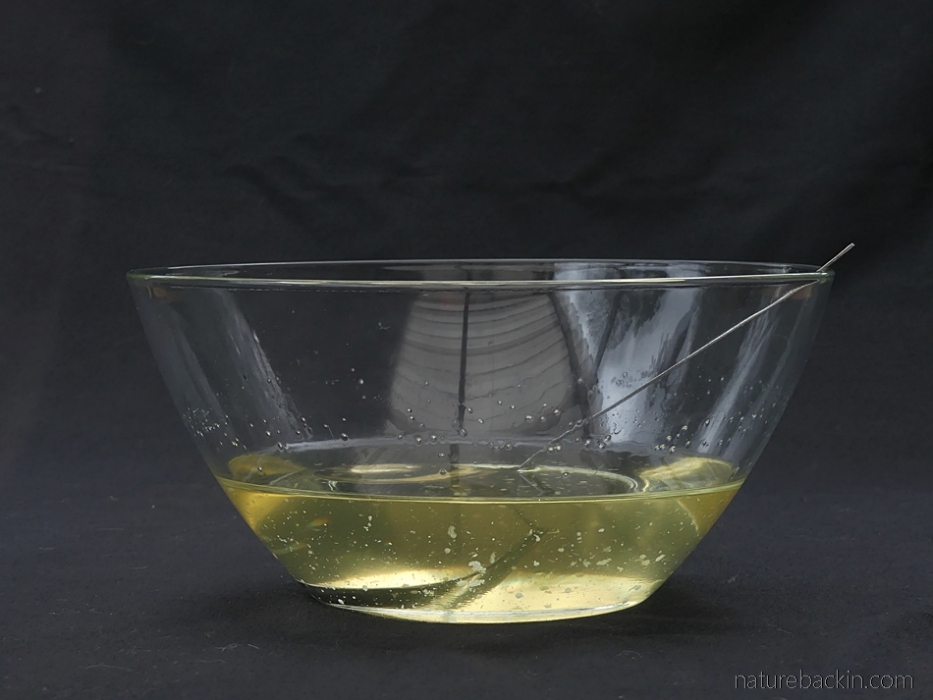
The ingredients for this basic soap are lye/caustic soda (sodium hydroxide), two oils these being pomace grade olive oil and coconut oil, and water (purified or distilled). Adding a few drops of an essential oil for scent is optional
I remembered that the recipe Barb used was called “Gina’s soap recipe” and that she found it in an online newspaper. I still have the copy she sent to me but without the source being credited, so I did an Internet search and much to my surprise I found that the New Zealand Herald article dating from 2010, which includes the soap recipe by Gina Roberts, can still be found online here.
The history of soap making is long and complicated. Essentially though soap needs an alkaline base to which fatty acids in the form of animal fats or plant oils are added. In hot process soap making, the combined ingredients are cooked together, and this was the principal traditional method, which is still used today.

Flakes of lye/caustic soda (sodium hydroxide) weighed in a repurposed cottage cheese container on my kitchen scale
The alkaline base most commonly used is lye. There are two types of lye – potash (potassium hydroxide) and caustic soda (sodium hydroxide). In pre-industrial contexts the alkaline base, known as potash, was derived from hardwood ash or the ash of specifically collected plants. Since the 1800s caustic soda has been produced commercially and it is now a by-product of the chlorine industry.
One way of making lye/potash would be to use a wooden barrel with a leaching hole in the bottom that initially has a bung in it. A layer of pebbles is placed in the bottom of the barrel, followed by a layer of straw and then the barrel is filled with wood ash. Heated rainwater is then poured into the ash-filled barrel so that the water slowly filters through the wood ash to leach out through the hole once the bung is removed to form an alkaline liquid that is collected in a container placed underneath. To obtain a stronger lye this leaching process is repeated several times over a period of days.

Image and caption from Open Source Ecology: https://wiki.opensourceecology.org/wiki/Lye
The end result could be unpredictable in terms of the degree of alkalinity achieved. Traditional ways of testing for sufficient strength would be to see if a chicken egg (or a potato) floats at the surface and if the lye is strong enough to dissolve a chicken feather that is dipped in. Lye decomposes protein, which is why it dissolves the feather and why it causes a chemical burn if you get any on your skin.
The lye produced from wood ash and water is potassium hydroxide (potash), which makes a softer or more liquid soap than sodium hydroxide (caustic soda), which is commercially produced. To make a harder soap, salt was added after the lye has been boiled together with the oils.
Most home soap makers who make cold process soap use commercially produced lye in the form of caustic soda (sodium hydroxide). Using lye/caustic soda requires caution and safety measures to prevent contact with one’s skin and particularly with the eyes as caustic soda can cause severe chemical burns. However, once lye/caustic soda reacts with oils to make soap, the resultant soap – which is chemically a salt – after it is sufficiently cured, is entirely safe and gentle on the skin.
Safety when working with lye
Working with lye requires caution. Make sure that pets and children are kept away from the area where soap is being made. Protect your eyes and skin – it is advisable to wear protective eye-wear, a face mask and to wear rubber gloves. In case of spills wear closed shoes and clothing that covers the arms and legs.
When lye is added to water (NB never add water to the lye) fumes are emitted and the solution warms up to become very hot. The harmful fumes must not be inhaled. When lye is added to the water, it is best to do this outside or in a very well ventilated space and best near an open window or door or extraction fan.
Equipment needed to make a basic cold process soap
Safety items when working with lye:
Rubber gloves
Protective eye wear – to shield the eyes from accidental splashing
Paper towel or cloth – for wiping if necessary
It is best to work slowly and carefully to avoid splashes, but rinse the skin with cold water should any splashes occur
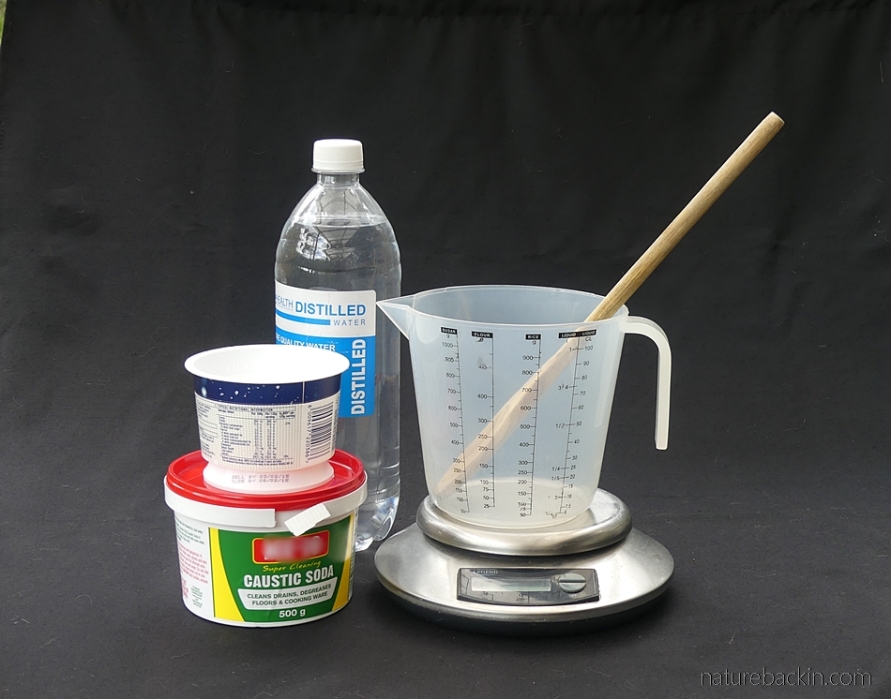
Equipment
Equipment can be wood, plastic, glass or stainless steel, but not aluminium as it reacts with lye
Small container for measuring out the lye crystals (I repurpose a plastic container for cottage cheese)
Small jug for water to which lye is added (safer than a bowl as it has a handle)
Spoon – wooden or stainless steel for mixing water to which lye is added
Kitchen scale
Large glass or ceramic bowl/saucepan – for heating oils
Wooden spoon
Candy thermometer
Stick blender (I have tried an electric beater but it tends to splash)
Spatula – for scraping soap mixture into the mould
Mould – I use a silicon loaf tin supported in a box so that the sides do not bulge when filled.

I altered the size of a cardboard box and lined it with cardboard and paper so that the silicon mould inserted into the box fits snuggly so it cannot bulge
Other items suitable to be used as moulds include a silicon muffin tray for larger-sized muffins or a silicone soap mould (obtainable from specialist soap-making suppliers). DIY options include a suitably sized cardboard or wooden box lined with parchment or wax paper. A milk carton can also be used as a mould. Once the soap has set the carton can be peeled off and then the soap cut into slices. To make round cakes of soap use a Pringles cylinder or a PVC pipe with one end sealed with wax paper secured by an elastic band or masking tape. Once the soap has set the tube can be removed and the cylinder of soap cut into slices.
Ingredients
This recipe makes enough soap to set in loaf tin used as a mould measuring about 20 x 10 cm (about 8 x 4 inches).
Coconut oil 500g
Olive oil (pomace) 500g
Water 380g
Lye/caustic soda 152 g
Optional:
Essential oil for fragrance – from just a few drops up to about 1.5 tsp
Notes: The lye used is caustic soda (sodium hydroxide). It is recommended that purified or distilled water is used, however, I once used tap water and the soap worked out just fine.
Method
First prepare the mould to be used.
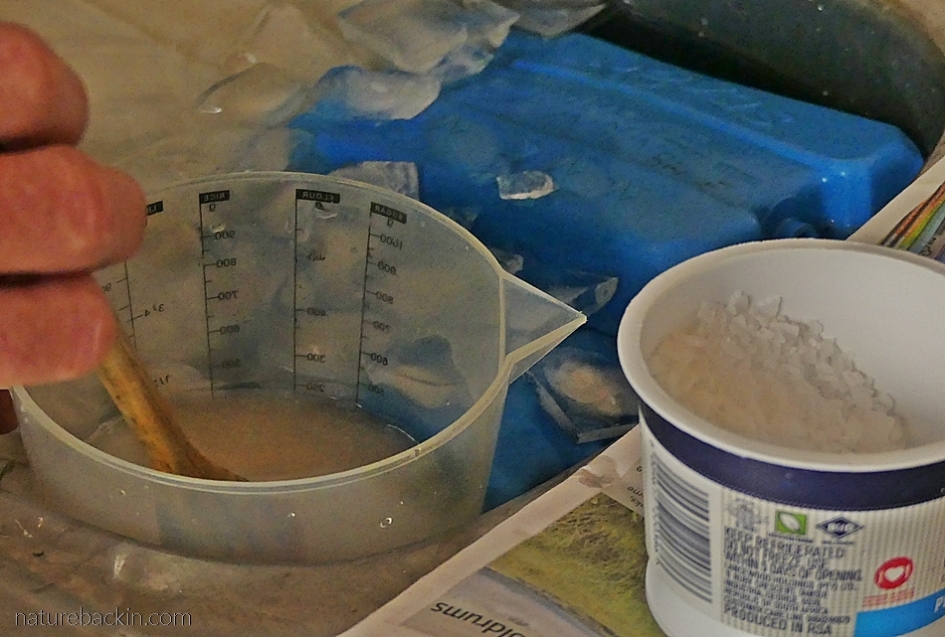
★ Place a plastic or glass jug on kitchen scale – pour water into that and measure to correct amount. In another container (I use a clean cottage cheese container) weigh out the caustic soda very carefully.
★ The next step is to add the caustic soda to the water. This is best done outside or in a well-ventilated space. Slowly and carefully add the caustic soda to the water (never the other way round). Stir the solution with a wooden spoon continuously until all the lye has dissolved (N.B. as it mixes it heats up to about 93 degrees C). Stand back as you work and do not breathe in fumes. Wear rubber gloves. Goggles and face mask also recommended.
★ Allow the solution to cool to between 30C to 40C. (I cool it to 40 degrees.) To hasten the cooling stand the jug in a sink of cold water. We add ice cubes and ice bricks to make the water even colder. Use a candy thermometer to check the temperature of the solution as it cools. Wipe the thermometer with paper towel before using the thermometer in the oils.

★ While the lye solution is cooling, place a large bowl on the scale. Tare the scale and add the coconut oil. Melt the coconut oil. I do this in the microwave – stopping every 30 seconds to stir it – for a total of about 90 seconds. (Melting the coconut oil can also be done in a saucepan on the stove top.)
★ Place the bowl (or saucepan) with the melted coconut oil back onto the scale and tare it. Add the olive oil and stir it to mix with the coconut oil.
★ Using the candy thermometer measure the temperature of the oils. It should be about 40 degrees. If cooler it can be warmed in the bowl in the microwave for a few seconds (or in the saucepan on the stove top). Do not overheat as the oils maintain their temperature and take a long time to cool down.
★ Check the temperature of the lye solution as it cools to the same temp as the oils. The lye solution and the oils each need to be about 40 degrees Celsius or a bit less.
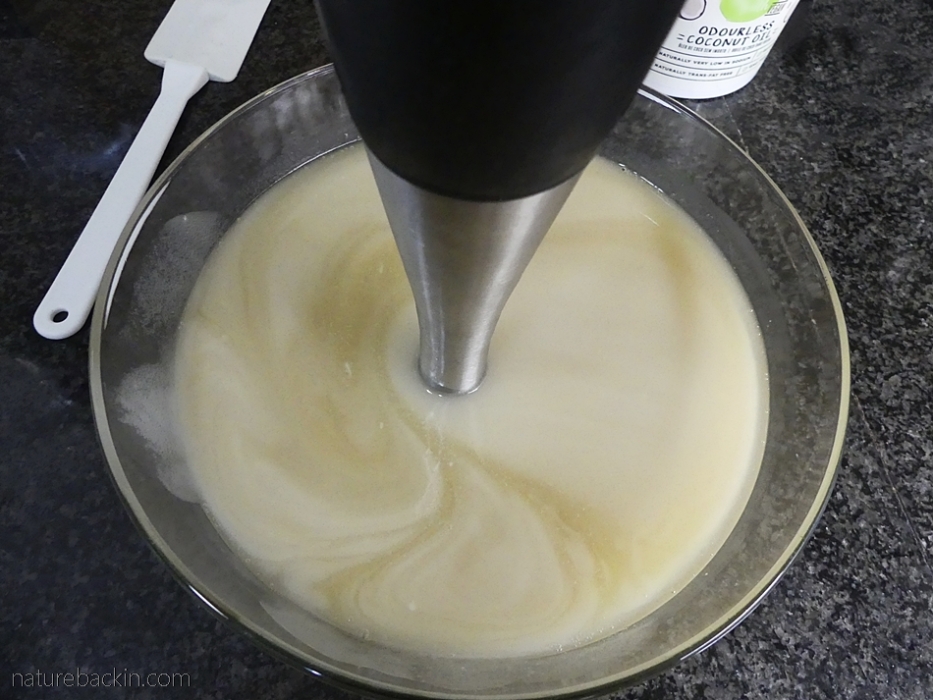
★ Once the temperatures are about the same, slowly pour the lye mixture into the oils stirring slowly with a wooden or stainless steel spoon. Once combined, start whizzing using a stick blender, moving the stick blender in a figure-of-eight pattern in the bowl.

★ Continue to use the stick blender until the mixture resembles a light custard. This can take in the region of 5 minutes or even longer than that. As the mixture thickens it approaches what is called trace – when the mixture will hold a drip line of mixture across its surface. (The trace must be good and perhaps mix a bit longer than you think (but not too long as mixture may “seize”, that is suddenly become very thick and gelled).

★ Optional: Once trace is reached add the essential oil and mix in well. The problem of seizing is most likely occur after certain essential oils have been added, so take care not to overmix at this point. In this batch of soap I added patchouli oil.

★ Pour the mixture into the mould. Use a spatula to scrape the bowl clean and get the last of the mixture into the mould.

★ Place a sheet of firm plastic or a piece of cardboard over the mould.

★ Place the covered mould in a box or another container to help insulate it. Cover with a towel or a blanket and/or place in a cupboard or drawer to keep it warm.
★ Leave the mould undisturbed for 24 hours. During this time the mixture warms up as it gels and neutralizes – a process known as saponification. This process works best when kept at an even temperature by being in a well-insulated space.
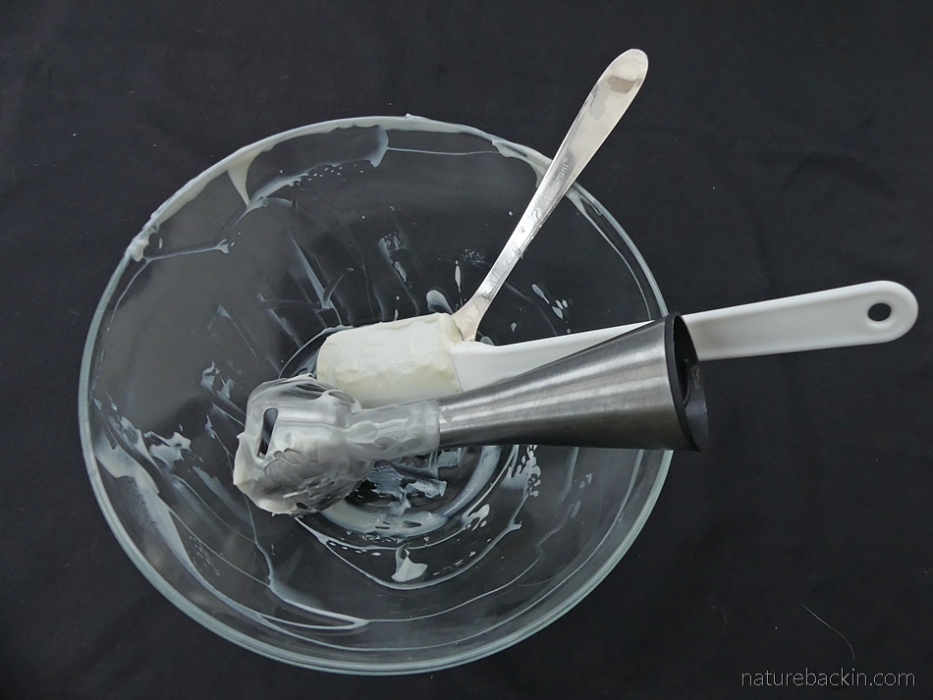
Tip: Leave the unwashed bowl, stick blender, utensils aside overnight – during that time the traces of the soap mixture saponify and they are then easy to wash the next day.
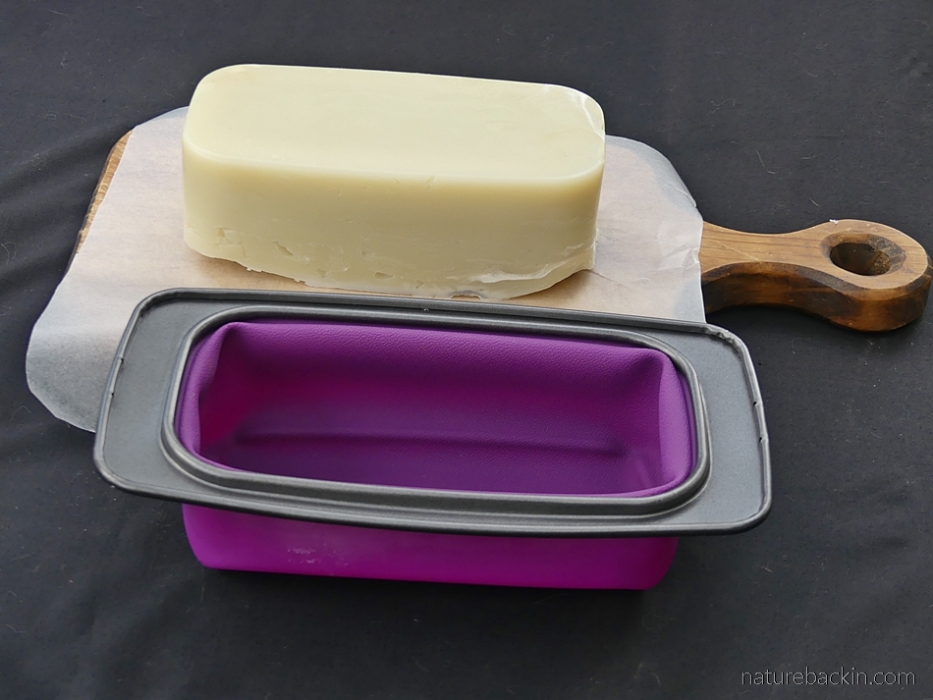
After 24 hours the soap will have set and it can be turned out of the mould.
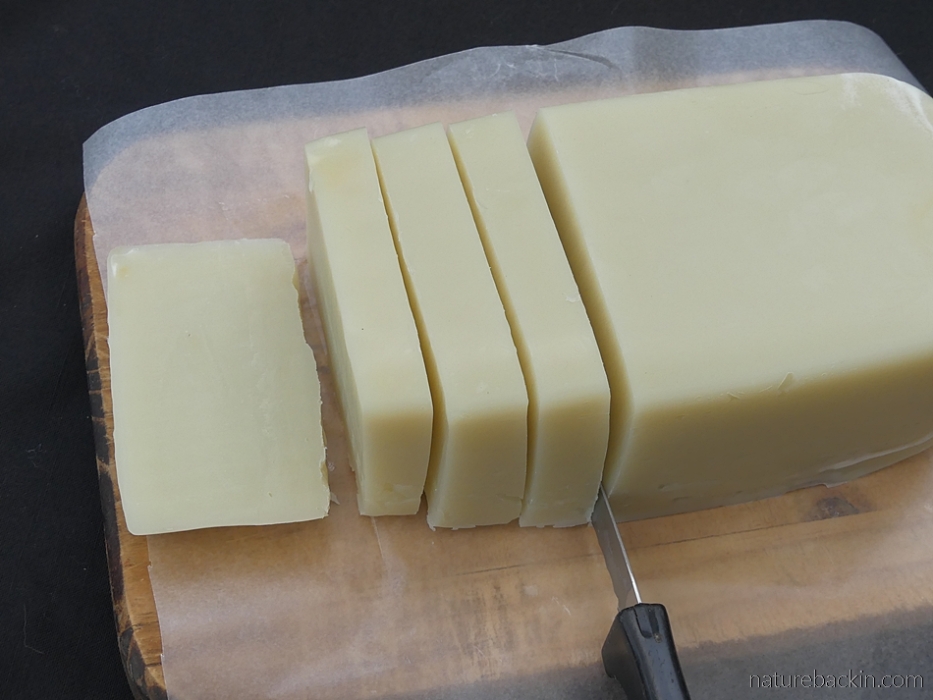
If a “loaf” shape mould has been used the soap can be cut it into bars using a serrated knife. The soap has saponified so it is fine to handle it as it has mostly neutralised.
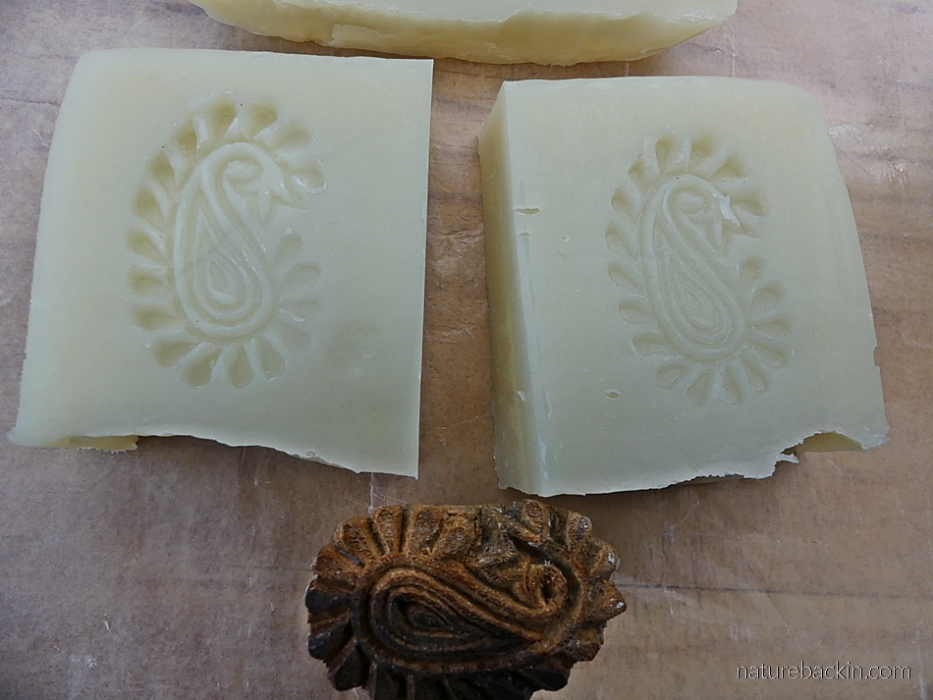
As a decorative touch, I press this wooden stamp into the soap to make an indented pattern on the surface of each bar.
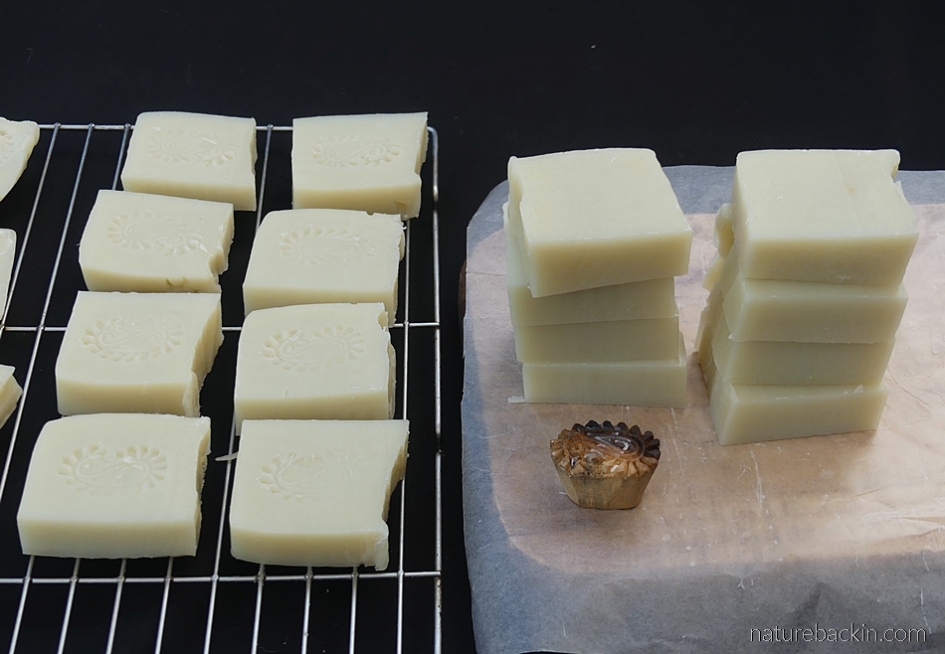
The finished bars are placed on a rack as the other bars are cut and stamped
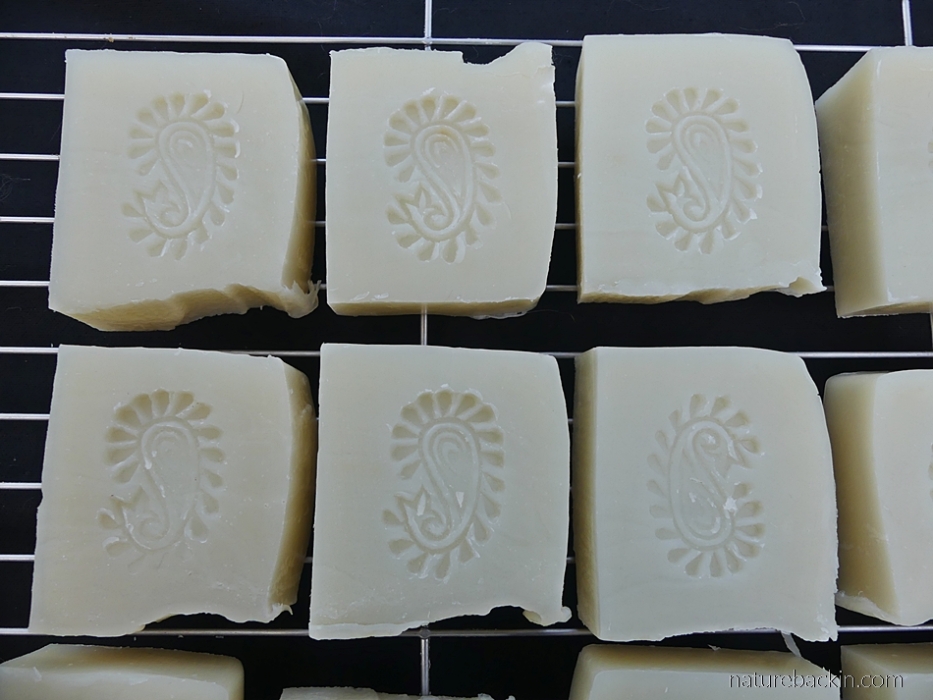
A closer view of the finished bars before curing shows their rather irregular shape. If a neater shape is desired the rough edge at the top of the bar can be cut off with a knife and the edges of each bar can be bevelled using a potato peeler. For one batch I did this neatening, but decided that it was a waste of soap as there were so many offcuts.

As I need my rack for baking, I arranged the finished bars on wax paper in a box for curing. I turn the bars of soap every few days so that they dry evenly. I cover the box with a sheet of wax proof paper to keep off the dust. The curing process takes between 4 to 6 weeks. I always leave the bars to cure for a full 6 weeks. During this time moisture evaporates, the bars continue to neutralise and the soap becomes firmer.

And that’s that. Once cured the soap is ready for use. It can be packaged in sleeves of paper that are cut to size to give away as gifts.
Sources
Country Farm Lifestyles. [n.d.] How to Make Lye for Natural Soap Making from Wood Ash. https://www.countryfarm-lifestyles.com/make-lye.html#.X5FaM9BLjMU
Helmenstine, Anne Marie. 2020. What Is Caustic Soda and Where Can You Get It? ThoughtCo. https://www.thoughtco.com/what-is-caustic-soda-608493
Lowimpact.org. 2018. Natural soaps: introduction. https://www.lowimpact.org/lowimpact-topic/natural-soaps/
Walton, James. 2018. Soap houses of the Karoo. The Heritage Portal. http://www.theheritageportal.co.za/article/soap-houses-karoo
Warner, Kirsten. 2010. The sweet smell of home-made soap (+soap and lotion recipes) 10 Dec, 2010. NZ Herald. https://www.nzherald.co.nz/lifestyle/the-sweet-smell-of-home-made-soap-soap-and-lotion-recipes/F4SUPCKX52NBPRPPRUIBPLFBGQ/
Wiles, Rich. 2016. Crafting traditional olive oil soap in Palestine. Al Jazeera. https://www.aljazeera.com/gallery/2016/4/8/crafting-traditional-olive-oil-soap-in-palestine/
Posted by Carol


November 2, 2020 at 7:28 pm
I do not make my own soap but enjoy the lovely soaps of others’ labors. A friend of mine who has a goat dairy farm makes goat’s milk soaps. A homemade bar of soap is unique and storied. I especially love scented homemade soaps. I’m using a pear soap today. Marvelous.
I like that you tracked down Gina’s recipe. That is a sweet connection for Barb and you. I noticed you said “late friend.” I’m sorry for your loss. Making soap must be like me baking pies using my mother’s recipes—each one brings her closer to me and the memories more vivid.
I may try this over the holidays. It sounds doable and fun.
LikeLiked by 1 person
November 2, 2020 at 8:21 pm
I can see how baking pies using your mother’s recipes brings her closer and enlivens memories. I don’t think the process of making soap brings quite the same feeling as baking does, but using the soap is very satisfying. It is also nice that you can choose what scents to use. I hope you do try it over the holidays.
Thanks for your kind thoughts about the loss of my friend Barb. She remains a strong presence in the lives of many of us, especially, of course, for her partner. I posted a tribute after she passed away that you can find here – https://naturebackin.com/2017/12/21/shine-on/#more-5016
LikeLiked by 1 person
November 2, 2020 at 8:41 pm
I am so glad I read your soap post—it held a triple gift: first, the inspiration to make soap; second, the lovely tree tribute to your friend Barb; and third, the “bird walk” from there to her piece about Olive Woodpecker. A gift, every one. And the message at the end of your tribute to Barb is especially comforting in these times, this year, today. Thank you for sharing all.
I recently had the pleasure of the company of Pileated Woodpecker outside my balcony garden. It was perched in a birch. Lovely. I like knowing about the feathers over their nostrils!
LikeLiked by 1 person
November 2, 2020 at 8:52 pm
Thanks for reading all three posts Cheryl.
I have seen photos of the Pileated Woodpecker and it looks very dramatic – in size, colouration and behaviour!
Take care. Fingers and toes crossed here as we see what unfolds in the US over the next few days …
LikeLiked by 1 person
October 28, 2020 at 10:55 pm
Wow! I’m impressed. This truly is seemingly a lost art. How wonderful to see some keeping up the tradition. Quite frankly it strikes me as utterly daunting, but I admire those willing to give it a go. I’ll just have to give it a go to get “over my trepidation” for now. ;
LikeLiked by 1 person
October 29, 2020 at 8:09 pm
Thanks Gunta. Imagine if trepidation regarding the potential hazards associated with soap making was the only worrying thing!
LikeLiked by 1 person
October 29, 2020 at 10:54 pm
Yeah, I could go with that! 😉
LikeLiked by 1 person
October 30, 2020 at 6:43 pm
🙂
LikeLike
October 26, 2020 at 3:16 am
Such a wonderful blog Carol! I hope to try making my own, thank you! xxx
LikeLiked by 1 person
October 29, 2020 at 8:04 pm
Hi Christeen – I do hope that you do give it a try and that you like the end result. Let me know if you do!
LikeLiked by 1 person
October 30, 2020 at 3:03 am
Will do Carol! xxx
LikeLiked by 1 person
October 30, 2020 at 6:54 pm
Great, thanks.
LikeLiked by 1 person
October 25, 2020 at 9:13 am
Thank you for this post Carol. Your instructions the useful photos are so clear – you helped me embark on this rewarding activity a year ago! I love my soap! It’s time for another batch.
How clever of you to track down the article that inspired Barb!
LikeLiked by 1 person
October 25, 2020 at 8:25 pm
Thanks Christine. It was nice to share this skill that I learnt from Barb. It was surprising to find the article still available. I hope you enjoy making your next batch of soap.
LikeLike
October 25, 2020 at 6:10 am
Fascinating stuff. Not sure I’m ready to tackle the lye elements of the process. I looked online for alternatives that might be less caustic, but they appear to be mostly along the lines of making a cake with cake mix! Not really soap making.
LikeLiked by 1 person
October 25, 2020 at 8:19 pm
Unfortunately lye does seem to be essential for real soap! If one is careful and methodical and can work uninterrupted, it can be safe enough working with lye, best done outdoors or where there is sufficient ventilation. We are fortunate to have a sink on the open porch near the kitchen door. which is a perfect place to mix the lye and leave it to cool.
LikeLiked by 1 person
October 26, 2020 at 5:01 am
Yes, an handy outdoor space would be good. I don’t really have that here, but maybe one day.
LikeLiked by 1 person
October 25, 2020 at 4:37 am
Thank you for sharing the information. I have also been a little afraid of using lye, but after reading your comments I might just try making some soap. The soaps would make the ideal gift too! Thank you for a very informative post!
LikeLiked by 1 person
October 25, 2020 at 8:15 pm
Thanks very much. Yes, homemade soap does make a nice gift. I think when making soap it pays to be methodical and it helps to get everything organised first and to make sure there is a safe and undisturbed place that is outside or well ventilated when working with the lye. I hope that you do try your hand at it.
LikeLiked by 1 person
October 24, 2020 at 4:14 pm
Fascinating. I wish all children had the opportunity to see a demonstration of something like this. In a world where so many people act like ‘products’ (edible or otherwise) magically grow on shelves, it is always good to spread insight into how something comes together.
LikeLiked by 1 person
October 25, 2020 at 8:12 pm
We have become very removed from what used to be everyday skills and practises. I imagine that our great-grandparents might be surprised at how unable to look after ourselves we have become. Not only do we not think about the products that magically grow on shelves as you describe so well, but we have come to depend on others to do even simple tasks that we can no longer do ourselves. I am thinking of really basic things like putting up a hem or cooking a meal from scratch …
LikeLiked by 1 person
October 23, 2020 at 1:39 pm
Is this the same process as for Castile soap? The steps seem the same, I think. Homemade soap made from scratch in this way (not the melt and pour type that often contains glycerine) is just the best! I only ever use Castile since discovering it a few years back. It is just so lovely to use. I buy it online- it works for everything- for face, bath and general cleaning. I keep some grated in a glass jar in the kitchen because it’s great for handwashing delicates, and also for including in the laundry powder mix which I sometimes make to use in my automatic washing machine. Your finished product looks lovely
LikeLiked by 1 person
October 23, 2020 at 1:54 pm
As far as I know the name Castile soap is applied to soaps where the oil used is exclusively or largely olive oil. I gather that Castile soaps can be made using either the hot process or cold process that I use.
The Castile soap you get sounds wonderful and so multipurpose too. I just use my soap as a bath soap but also as a shampoo.
Your laundry powder mix for the washing machine sounds interesting. Does it include washing soda?
Glad you like the look of my soap – thanks!
LikeLiked by 1 person
October 23, 2020 at 2:00 pm
Yes… 1 cup each washing soda & borax, about 70 grams fine grated castile and 2 tablespoon bicarb. Between 1 and 3 tablespoon per load.
LikeLiked by 1 person
October 23, 2020 at 2:03 pm
Oh – thanks so much for the recipe. Much appreciated.
LikeLiked by 1 person
October 23, 2020 at 9:18 am
Very interesting indeed, Carol, and I am sure very satisfying too!
LikeLiked by 1 person
October 23, 2020 at 12:38 pm
Thanks. I admit is has become just a task to do among many – the satisfying part is using the really lovely soap. It is mild enough to use as a shampoo too.
LikeLiked by 1 person
October 23, 2020 at 8:29 am
I salute your industry, Carol.
LikeLiked by 1 person
October 23, 2020 at 12:36 pm
Thanks Mariss. Compared to stitching, I think soap making is really simple 🙂
Starting from scratch to getting the soap into the mould takes about an hour, so its not all that time consuming really.
LikeLike
October 23, 2020 at 1:36 pm
Perhaps it’s to do with preferences and what is to hand. Gathering the utensils and ingredients for soap making would take me a while
LikeLike
October 23, 2020 at 7:57 am
Home-made soaps are great to use. I haven’t made any but have benefited from the labour of others. The historical background you provide is fascinating and your instructions are very clear.
LikeLiked by 1 person
October 23, 2020 at 12:34 pm
Yes homemade soaps are very nice and it was an interesting project to tackle at first. Now that I understand it better it is not such a arduous thing to do and so worthwhile.
Thanks – I wish I had more space for some more of the really interesting history that I discovered when reading for this post. For instance, a tax on the manufacture of soap was levied in England in 1712 and only repealed about 140 years later!
LikeLiked by 1 person
October 23, 2020 at 5:54 am
I’m going to hide behind the fact that winter’s coming on so it’s no time to be doing all that stuff with lye (scary!) outside. Our home is small too, so all that leaving soap out to dry might be a nuisance. Finally, we have old fashioned scales, so taring back to zero can’t happen. In other words, that was fascinating, but on this occasion you haven’t convinced me to roll up my sleeves and get stuck in!
LikeLike
October 23, 2020 at 12:29 pm
I can see why! I was intrigued by the process, and although initially very anxious about the lye, it has now become a predictable routine and the soap is really very nice to use.
My friend cured her soap in a cupboard btw 🙂
LikeLiked by 1 person
October 23, 2020 at 4:41 pm
You’re talking to someone who regarded the school chemistry lab with a great dal of distaste. Never say never, but maybe next summer when working outdoors becomes possible again.
LikeLiked by 1 person
October 23, 2020 at 12:26 am
Certainly a labor of love. The lye part scares the heck out of me! 😉
LikeLiked by 2 people
October 23, 2020 at 12:23 pm
I think it is not as laborious as it sounds – I just tried to explain it rather painstakingly!
I agree the lye is scary, but now we know what to expect it is okay. It helps that we have a sink on the open porch by the kitchen door so the lye can be mixed and cooled out there,
LikeLiked by 1 person
October 22, 2020 at 9:20 pm
Thank you – really clear instructions. I’ve always been a little nervous to make soap before but I’m encouraged to give it a go now 😊
LikeLike
October 23, 2020 at 12:22 pm
Oh I hope that you do. This is a lovely mild and creamy soap and good for hair washing too.
Once I got over my trepidation re the lye and established a clear routine when making soap, it is not a difficult process. It takes about an hour to make and get it into the mould – a lot of the time is in cooling the lye, so that is not long really. (It makes it easier that my husband takes care of the lye while I prepare the oils.) And unmoulding and cutting it becomes easier too.
Good luck if you decide to try your hand at it. There is a lot of useful info out there online.
LikeLike